Unity
To run Unity, you need to install Unity Hub, which is a manager of Unity installations. Through the Unity Hub, install the lateset release of Unity, and run.
Hierarchy
Game objects create a hierarchy. We can place items under other items. Then, the positioning of the child items is relative to their parents.
Scripting
Scripts can be added to the Assets, and they should be attached to some game object to work.
Editor Access
To modify script’s (class’s) fields in the Unity Editor UI, one of these should be applied:
- the field should be decorated with
SerializeField - the field shuld be
public
The first approach is the recommended one, since a public field makes it
accessible to any other script as well.
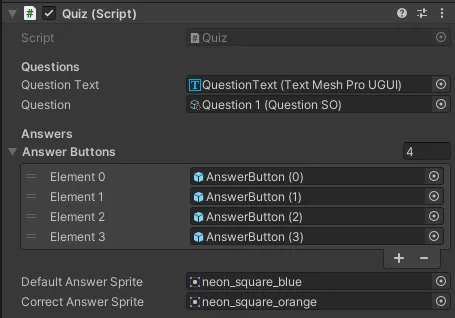
External Access
Each script is a class. We can access instances of these classes from other scripts (classes) as follows:
FindObjectOfType<PlayerController>().DoSomething();The FindObjectOfType comes from the MonoBehaviour base class. It returns the
first found instance of PlayerController (I’m assuming that there is such a
script defined). We can also use FindObjectsOfType<>() if we expect there to
be many instances of some script.
The C# public keyword should be assigned to those components of our classes
that we want to be accessible from the outside, by other scripts.
Scriptable Objects
Other than a normal Script, there is also a Scriptable Object. This kind of script is optimized for low memory footprint, it is useful for storing data. They are not attachable to game objects.
Examples of usage:
- statistics of objects in RPG game
- all cards in card game
- questions/answers in a quiz game.
We create a Scriptable Object the same way as a typical Script (Create -> C# Script).
Here’s code example:
[CreateAssetMenu(menuName = "Quiz Question", fileName = "New Question")]public class QuestionSO : ScriptableObject{    [TextArea(2, 6)] //displays a bigger text area in the Unity editor    [SerializeField]    private string _question = "Enter new question text here";    public string Question => _question; // public getter
    [SerializeField]    private string[] _answers = new string[4];
    [SerializeField]    private int _correctAnswerIndex;    public int CorrectAnswerIndex => _correctAnswerIndex; // public getter
    public string GetAnswer(int index) => _answers[index]; // public method}
The [CreateAssetMenu] attribute makes our Scriptable Object available in the
context menu of Unity’s Create:

When we create an “object” based on our Scriptable Object, Unity’s Editor will display the fields that we’ve configured:
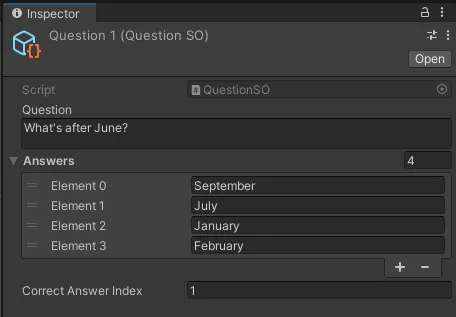
Physics
Physics in the game is caused by RigidBody. One of its properties is Gravity. In 2D top-down games, Gravity should be brought down to 0, otherwise the Rigidbody will cause the game object to fall down.
For a Rigidbody, there’s a Body Type selection:
- Kinematic - for things that move but are not going to bounce of ofther objects
- Dynamic - “full” physics, with bouncing
- Static - object is not going ot move, we just need it to be collidable (Collider is still needed).
Collisions
If we want to collide with some object, both objects should have a Collider. Additionally, to make the objects move on collision, they need to have Rigidbody.
Layers
Game objects may be placed on different layers (different than Sorting Layers). Then, we can define how objects from different layers collide with each other (or not) in the Project Settings (2D Physics section):
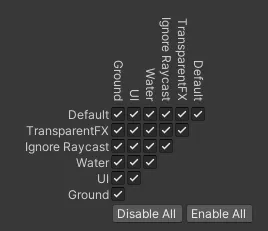
In this cases, all layers collide with all the other layers.
With layering we could have a setup where a player is able to go through some objects (of some specific layer), while enemies (being on a different layer that the player) will not be able to go through these objects.
Collision Trigger
Sometimes we don’t need physics to be involved in a collision. All we might want is to know that some object touched another. An example of that is a player reaching the finish line
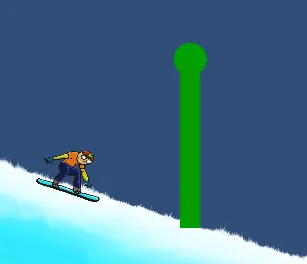
For such cases, a Collider has the isTrigger property. A proper script behind object with such a collider will fire anytime another collider touches this collider.
public class FinishLine : MonoBehaviour{ private void OnTriggerEnter2D(Collider2D other) { Debug.Log("Finish Line reached!"); }}Timing
The spped of movement of objects should not rely on FPS of the host machine. We
should multiply the object’s translation by the Time.deltaTime, which is the
time frame. This way, the intended translation will be properly divided for each
frame giving us the desired translation after each second.
Units
Unity does not have any particuar unit system. While designing our games, we should come up with our own way understanding these units. One way is to treat 1 Unity unit as 1 meter. This way, the grid on the screen divides the world in 1m x 1m squares. We can scale game objects with regard to that system. The same way, we can calculate speed of objects, to make things look and behave “naturally”.
Sprite Shape
Sprite Shape is perfect for creating ground in 2D platformer games. It allows us to modify the shape of the land easily with vector graphics tools. We should add an Edge Collider to it, and it will automatically follow the Sprite Shape’s shape. Sometimes it’s necessary to adjust the offset of the Shape Controller to have the collision exactly where we want it to be.
Camera
Auto-follow
To have the Camera following the player, we can do one of:
-
script the camera position to be updated in every frame to player’s position
transform.position = _thingToFollow.transform.position + new Vector3(0, 0, -10);// we're adding -10 on Z axis to keep the camera away from the game world -
use Cinemachine - a package for camera management. The camera will auto-follow any specified game object. Additionally, we’re able to specify things such as: deadzone, damping factor, and many more.
Cinemachine
Cinemachine is much more than just auto-follow. It allows us to:
-
Create multiple virtual cameras. We can switch between them based on some condition, like the current state of some object in its Animator. A State-Driven Camera is needed for that.

-
We can define the borders (confinement) that restricts the camera’s movement. Here’s an example:
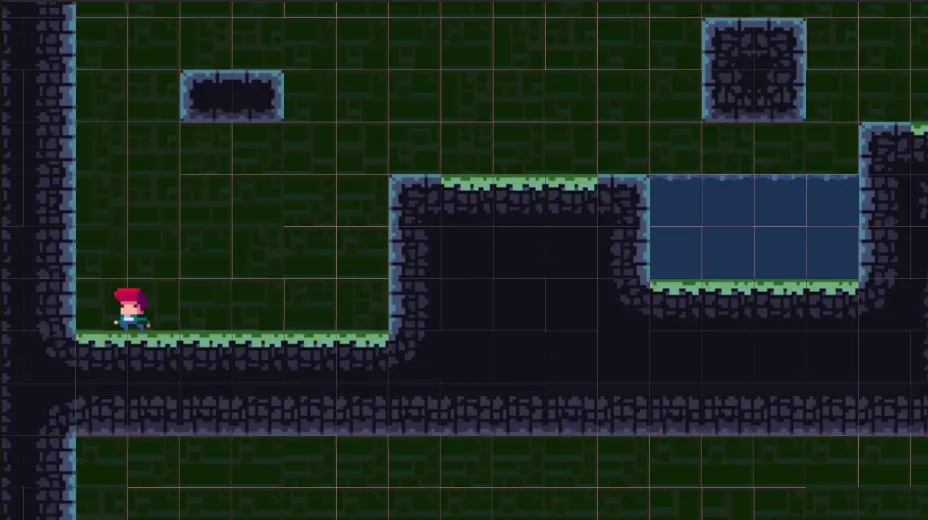
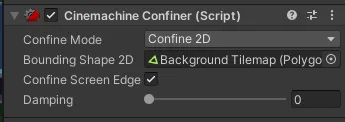
Even though the player should be in the center, due to confinement settings, the camera does not move past the collision area of the confinement object. The confinement is an extension that needs to be added to the virtual camera:
Tagging
Tagging is a useful concept in Unity that allows us to add a simple string
metadata to our game objects. Multiple objects might reuse the same tag. In our
scripts, we can read tags of other objects to create some conditions. For
example, a Finish Line should only activate its script when Player reaches it.
Other objects passing through it might not necessarily need to invoke any
actions. The way to do it would be to check the tag of the other object.
public class FinishLine : MonoBehaviour{    private void OnTriggerEnter2D(Collider2D other)    {        if (other.tag != "Player") return;
Debug.Log("Finish Line reached!"); }}Delay
There are two ways to delay some action in Unity:
Invoke()- works likesetTimeoutin JS. Weirdly, instead of accepting a delegate, it accepts a name of the method to be invoked, as string. That means that it used reflection under the hood, which is not perfect.- Coroutines
(What about async?)
Particles
Unity suppors Particle System. Any game object might have Particle System component added. Another way is to add a game object for the particles and to attach the particles to some other object.
Particles are very configurable, we can set all the looks of it as we’d like. An interesting setting is the Simulation Space. By default it’s set to “Local”, which means that the particles will always be positioned relatively to the object they’re attached to. An alternative is the “World” setting, which makes the particles position relative to the game world, making some effects more valid. If player bleeds, we don’t want to blood drips to move with the player, but rather to stay where they were released.
Another important settings are:
- Looping
- Play On Awake
Tiles
When creating 2D games, especially pixelart ones, it makes sense to use square tiles to build the game world. It could be some platformer or top-down game.
The process is usually as follows:
- Create/Get some assets with these tiles. Usually the tiles belonging to one “theme” are packaged all together in one file. Here’s an example:

-
Add this file (or files) to the project.
-
Adjust the Pixels Per Unit setting so that the size of the inidividual tiles is correct (whatever is comfortable, e.g., tile’s width equal to Unity unit).
-
Select the file, change its Sprite Mode to Multiple.
-
Open the Sprite Editor and split the file so that each tile has its own box. Click Apply and close the editor.
-
Add a TileMap game object to the Scene. It will also create a Grid game object. If there will be multiple Tilemaps (different layers of the scene), put them all under a single Grid.
-
Open the Tile Palette and create a new palette.
-
Drag the split tiles into the palette, save the assets somewhere (like the
Assets/Tilesdirectory).
At this point, we can start placing the tiles into our Tilemap. When there are multiple Tilemaps, make sure that the right one is selected before you start to place the tiles.
Rule Tile
Placing tiles one by one is quite tedious, especially when building bigger levels. It might make sense to create a Rule Tile. Rule tile is a combination of multiple tiles, where each of them has rules defined regarding its placement. Here’s an example of a rule:

For the specified tile, there shouldn’t be any other tile placed where the red “X”s are placed. On the other hand, this kind of tile requires some other tiles to be placed on the opposite corned (greed arrows). Additionally, we this tile can be mirrored in the X axis - the grey array signifies that.
We also have the option to specify the same rules for multiple tiles, making the choice random for Unity.
The order of the rules is meaningful. The first rule that satisfies the given placement will be selected.
With the Rule Tile defined, creating the world is greatly simplified, we just have to paint a single Rule Tile all over the place, and the proper sprites will be painted in its place. Here’s an example:
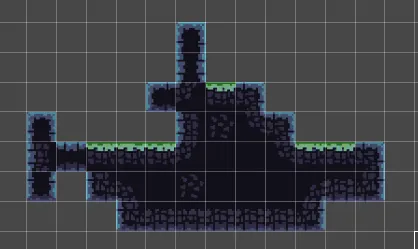
It seems that a separate Rule Tile should be created for separate “themes” of our tiles. For example, the tiles for the forest would be different than the tiles for dungeons. The rules would probably be similar, but the sprites would be different.
(Don’t the assets from Unity Asset Store come with the Rule tile predefined? I guess it would make sense)
Prefabs
If we want to reuse some game object many times in our game, it makes sense to turn it into a Prefab. Prefab is a template that can be instantiated as many times as we want. So, for example, we could have Player game objects with configured graphics, animations, sounds, etc. We could turn it into a prefab to easily instantiate it in different levels. We could probably say that the default game objects that we can create in Unity (like the Circle Sprite) is a kind of a prefab.
To turn some game object into a prefab, we need to drag that object from the
Hierarchy panel down to the Project explorer. A new file with a .prefab
extension will be created.
When we make changes to the prefab, all instances will be updated as well. We can still apply some individual changes to a single instance of a prefab (“override”) as well though.
Prefab instances have a blue-ish color in the Hierarchy panel.
Variants
Prefabs may also use a kind of inheritance. Here’s an example:
I could have a crystal collectible in my game. Such an item is a good candidate for a prefab. Then, I could decide to have another kind of a crystal, that one would have a different color, and possibly a different value in the game. Instead of creating a totally different prefab, I could create an instance of my original prefab, change it as needed, and create a new prefab based on it. Unity Editor will ask if I want to save it as a Prefab Variant.
With Prefab Variants, changes made to the original Prefab are also translated to the Variant. This exludes changes to properties that the Variant was created with. So, if my variant crystal was supposed to have a different color, changing the color of the original crystal will not impact the Variant.
Input System
Unity has two ways of controlling the game:
-
the old way with
UnityEngine.InputAPIs - simpler -
the new way with the Input System package that has to be installed into a project. It is more convoluted to set up, but it is more “declarative”. There is a panel where we can configure all possible actions in the game and bind it to various sources (keyboards, gamepads, etc.).
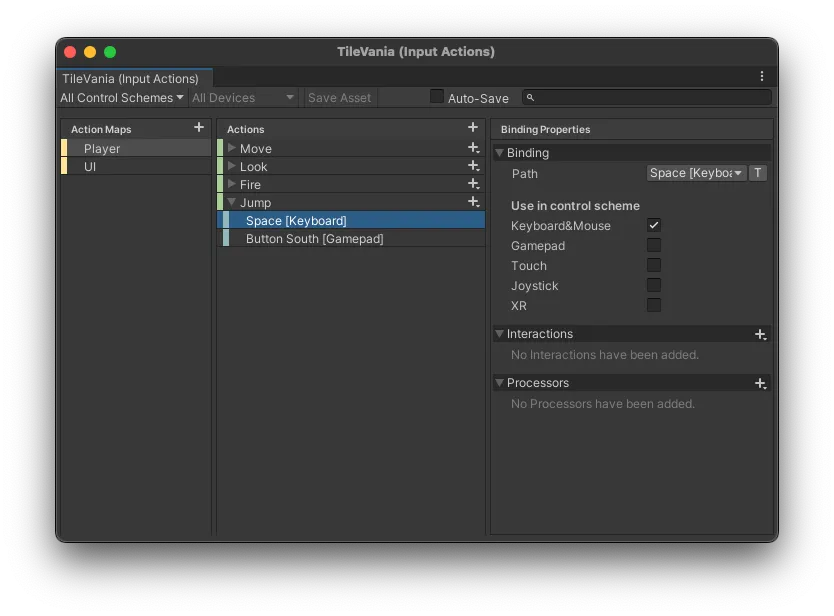
There are many ways to invoke our scripts on input - via special methods, events, and others.
Animations
Game objects may be animated. Here’s what is needed:
- the actual animation sprites - we highlight all of them and create an Animation file based on them.
- the Animation Controller file - we have to create it in the Project panel. When it’s created, we can drag-n-drop the Animations created in the previous step. Each animation is a state in a state machine that we’ll be defining. We can create transitions from one state to another. We can define some Parameters. Based on values of these parameteres, we’ll be transitioning from one state to another.
- the Animator component on the game object to be animated. In the component, we need to point to the proper Animation Controller that we want to use with that game object.
Here’s an example of some Animation Controller setup:
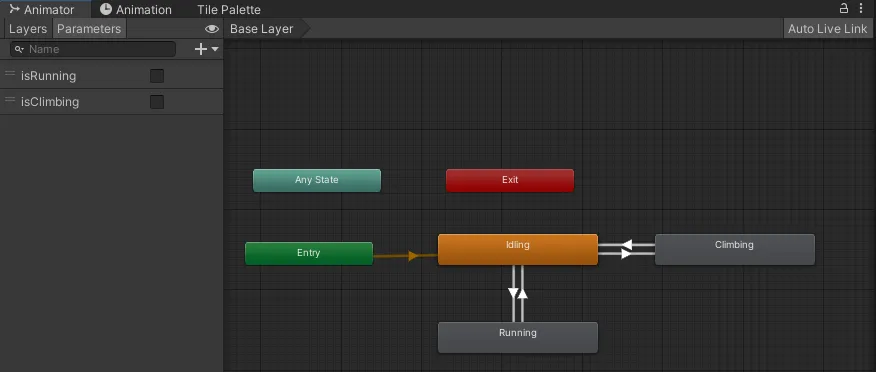
There are a few states, the transitions are defined based on the values of the parameters.
Tips
- If the icons in the Scene panel are too big, we can decrease their size by manimulaitng the 3D Icons Size slider under the globe icon in the toolbar.